Recently I wanted to upcycle an ill-fitting summer dress. So I made a well-fitting skirt of it. When I was finished sewing, many scraps of nice printed tulle were scattered on my working table… and this assembly looked inspiring, so I decided to have a go at freestyle crazy patchwork!
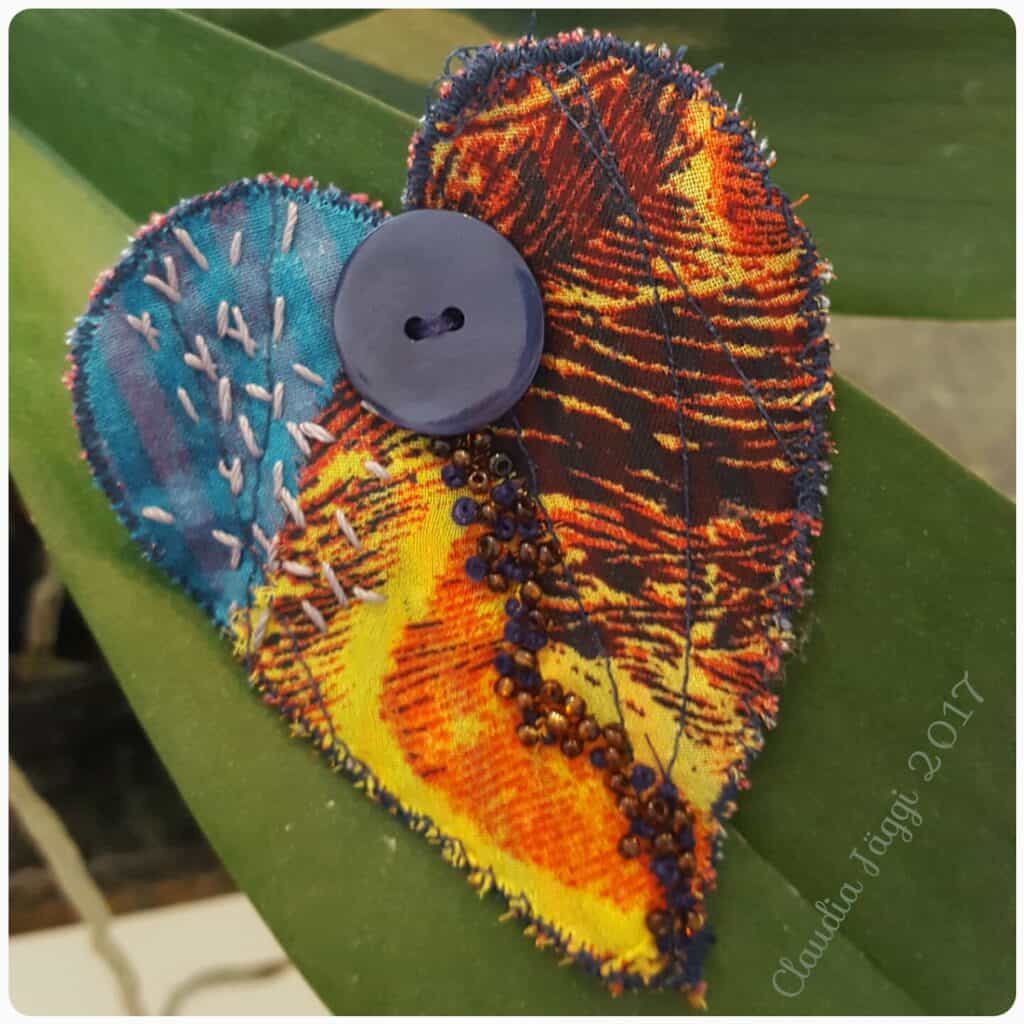
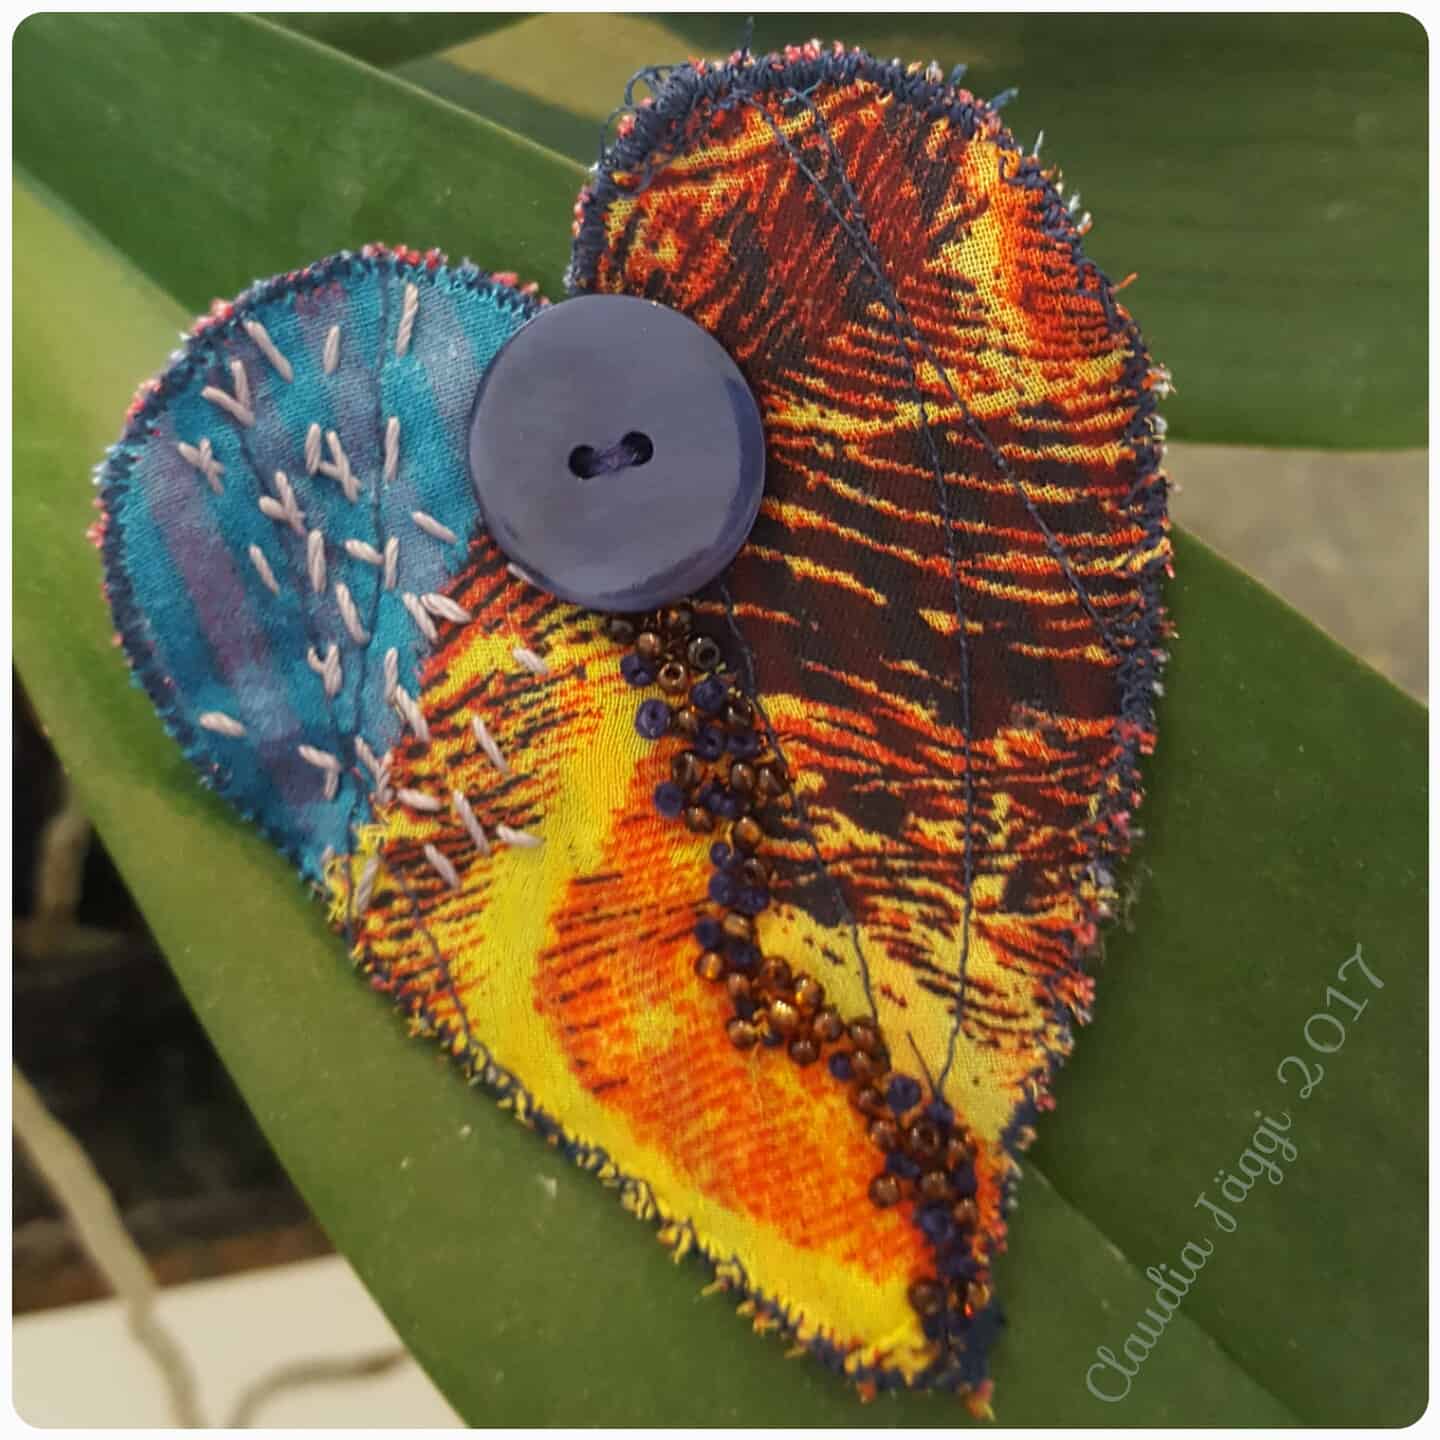
What follows is a short tutorial of how I made my fabric patches (see above sample picture).
Step 1:
Pin scraps of fabric randomly on a background fabric. The pieces can overlap and/or you can leave some spaces blank so that the background fabric is visible.
Sew the scraps on the background fabric with your sewing machine. Use a straight stitch and just sew some lines.
 Step 2:
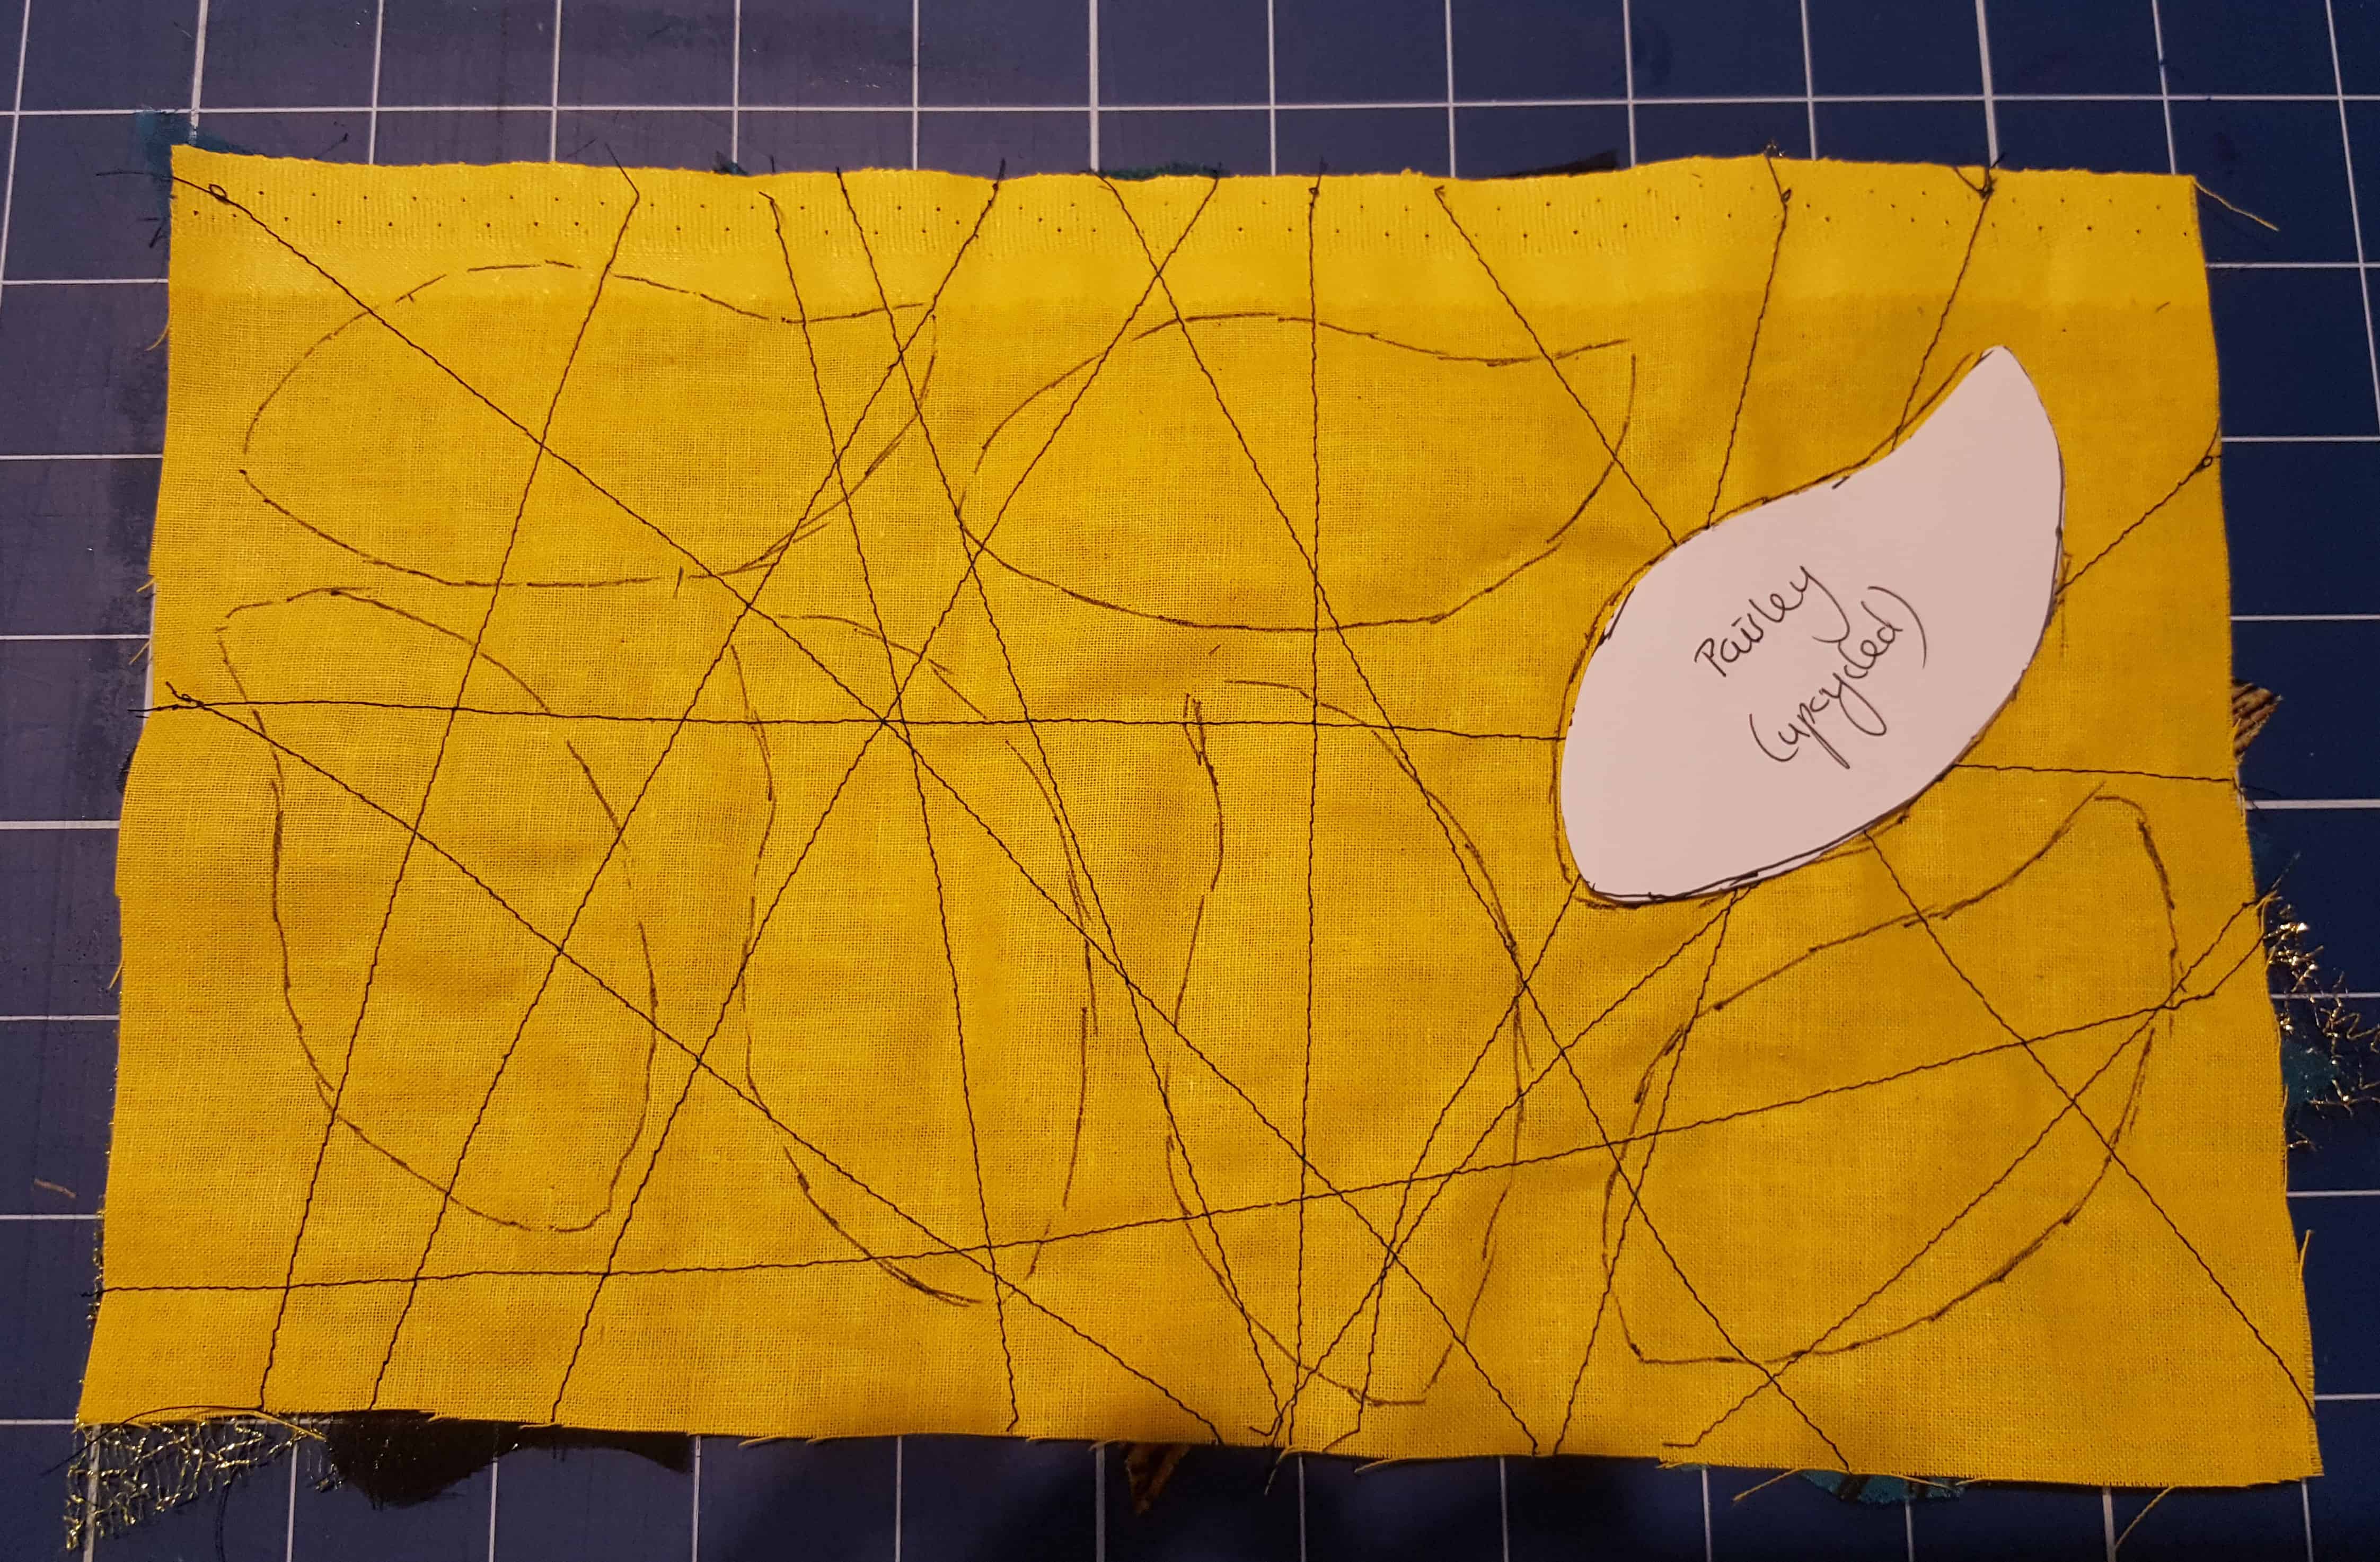
Turn the project around and outline your desired shapes directly on the back of the background fabric.
Step 3:
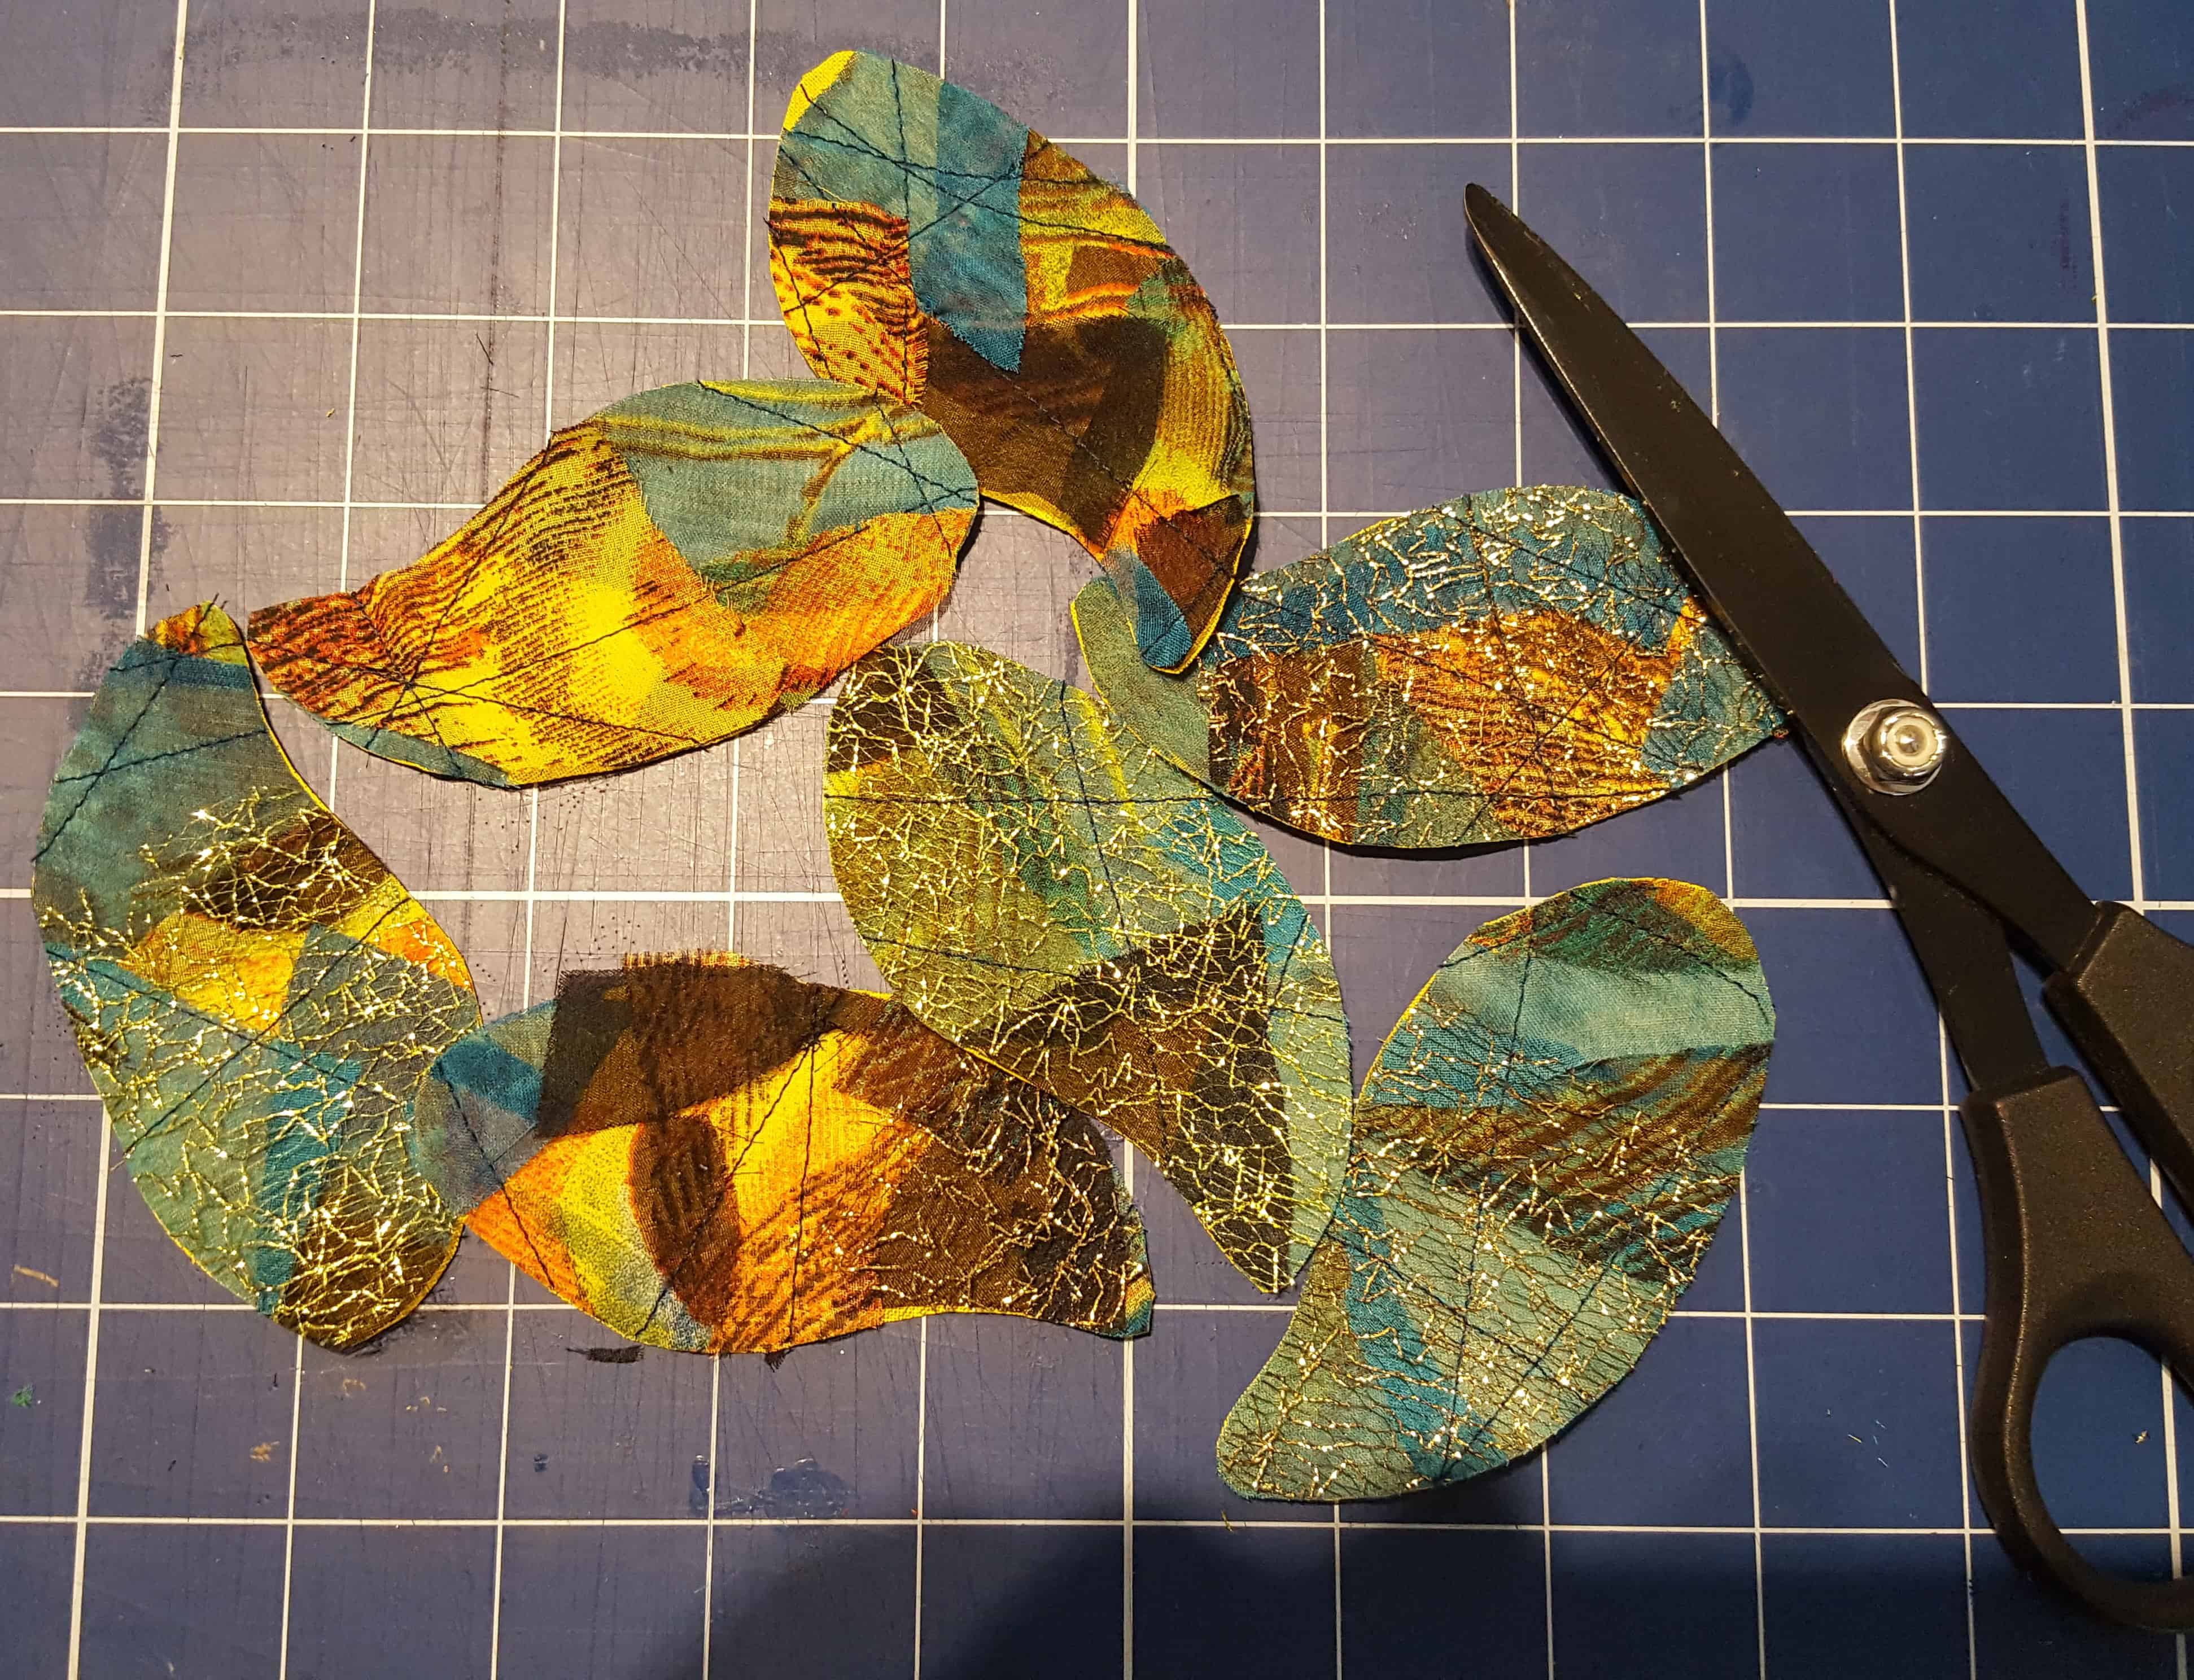
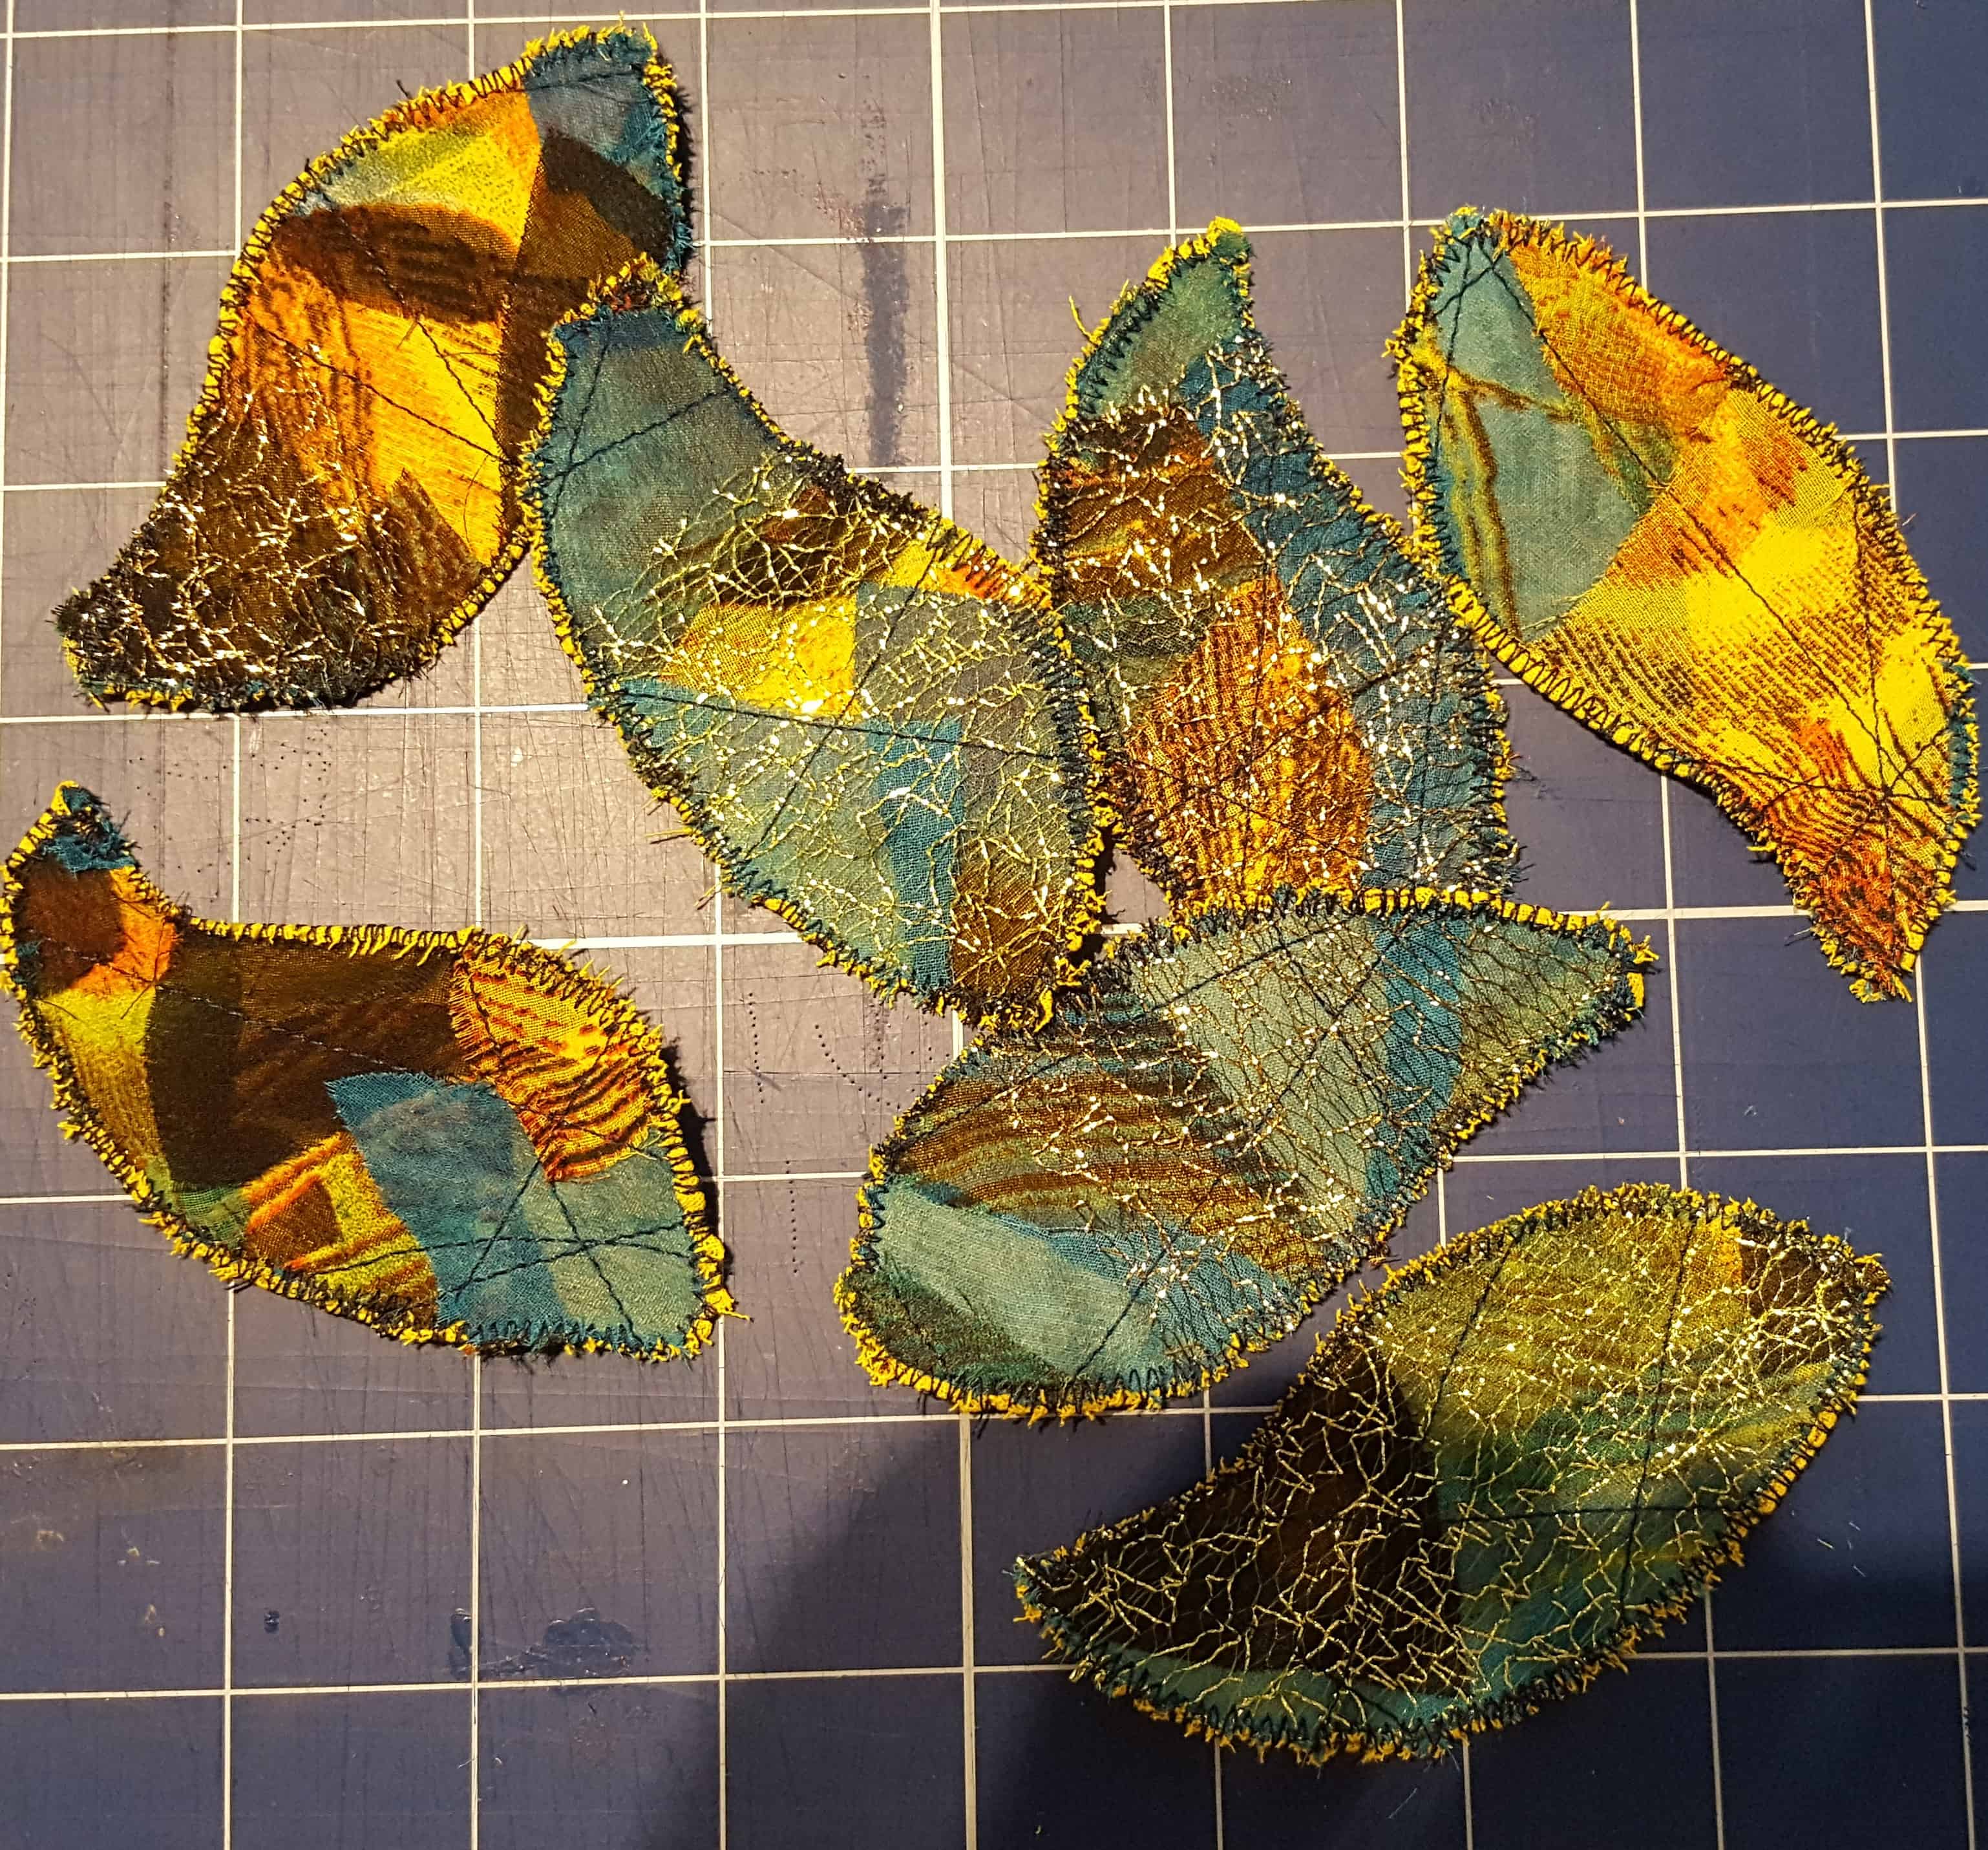
Cut out the shapes with your fabric scissors.
Step 4:
Using your sewing machine, fix the fabric borders with a zig-zag stitch. You can use a contrasting thread color, if you like.
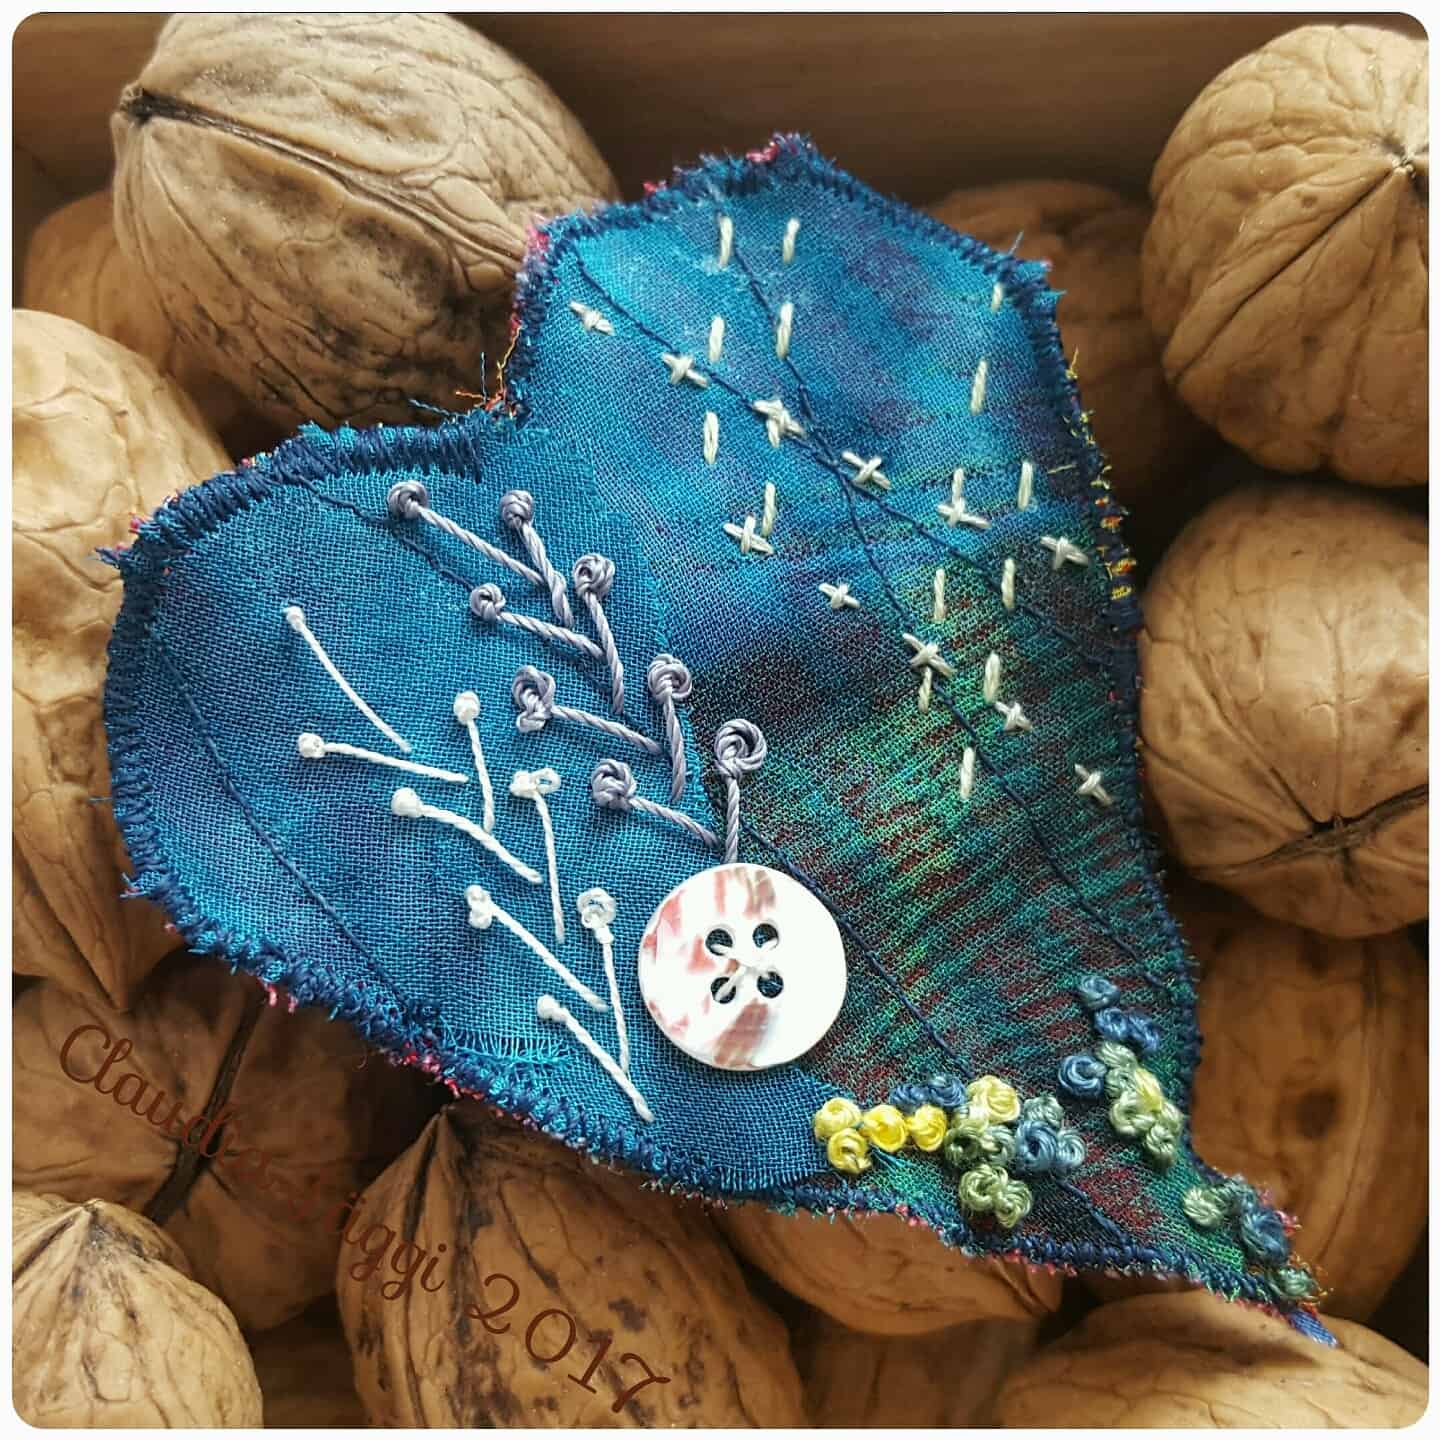
Step 5:
Embellish the patches with embroidery, vintage lace, buttons and other paraphernalia.
Recently I wanted to upcycle an ill-fitting summer dress. So I made a well-fitting skirt of it. When I was finished sewing, many scraps of nice printed tulle were scattered on my working table… and this assembly looked inspiring, so I decided to have a go at freestyle crazy patchwork!
What follows is a short tutorial of how I made my fabric patches (see above sample picture).
Step 1:
Pin scraps of fabric randomly on a background fabric. The pieces can overlap and/or you can leave some spaces blank so that the background fabric is visible.
Sew the scraps on the background fabric with your sewing machine. Use a straight stitch and just sew some lines.
Step 2:
Turn the project around and outline your desired shapes directly on the back of the background fabric.
Step 3:
Cut out the shapes with your fabric scissors.
Step 4:
Using your sewing machine, fix the fabric borders with a zig-zag stitch. You can use a contrasting thread color, if you like.
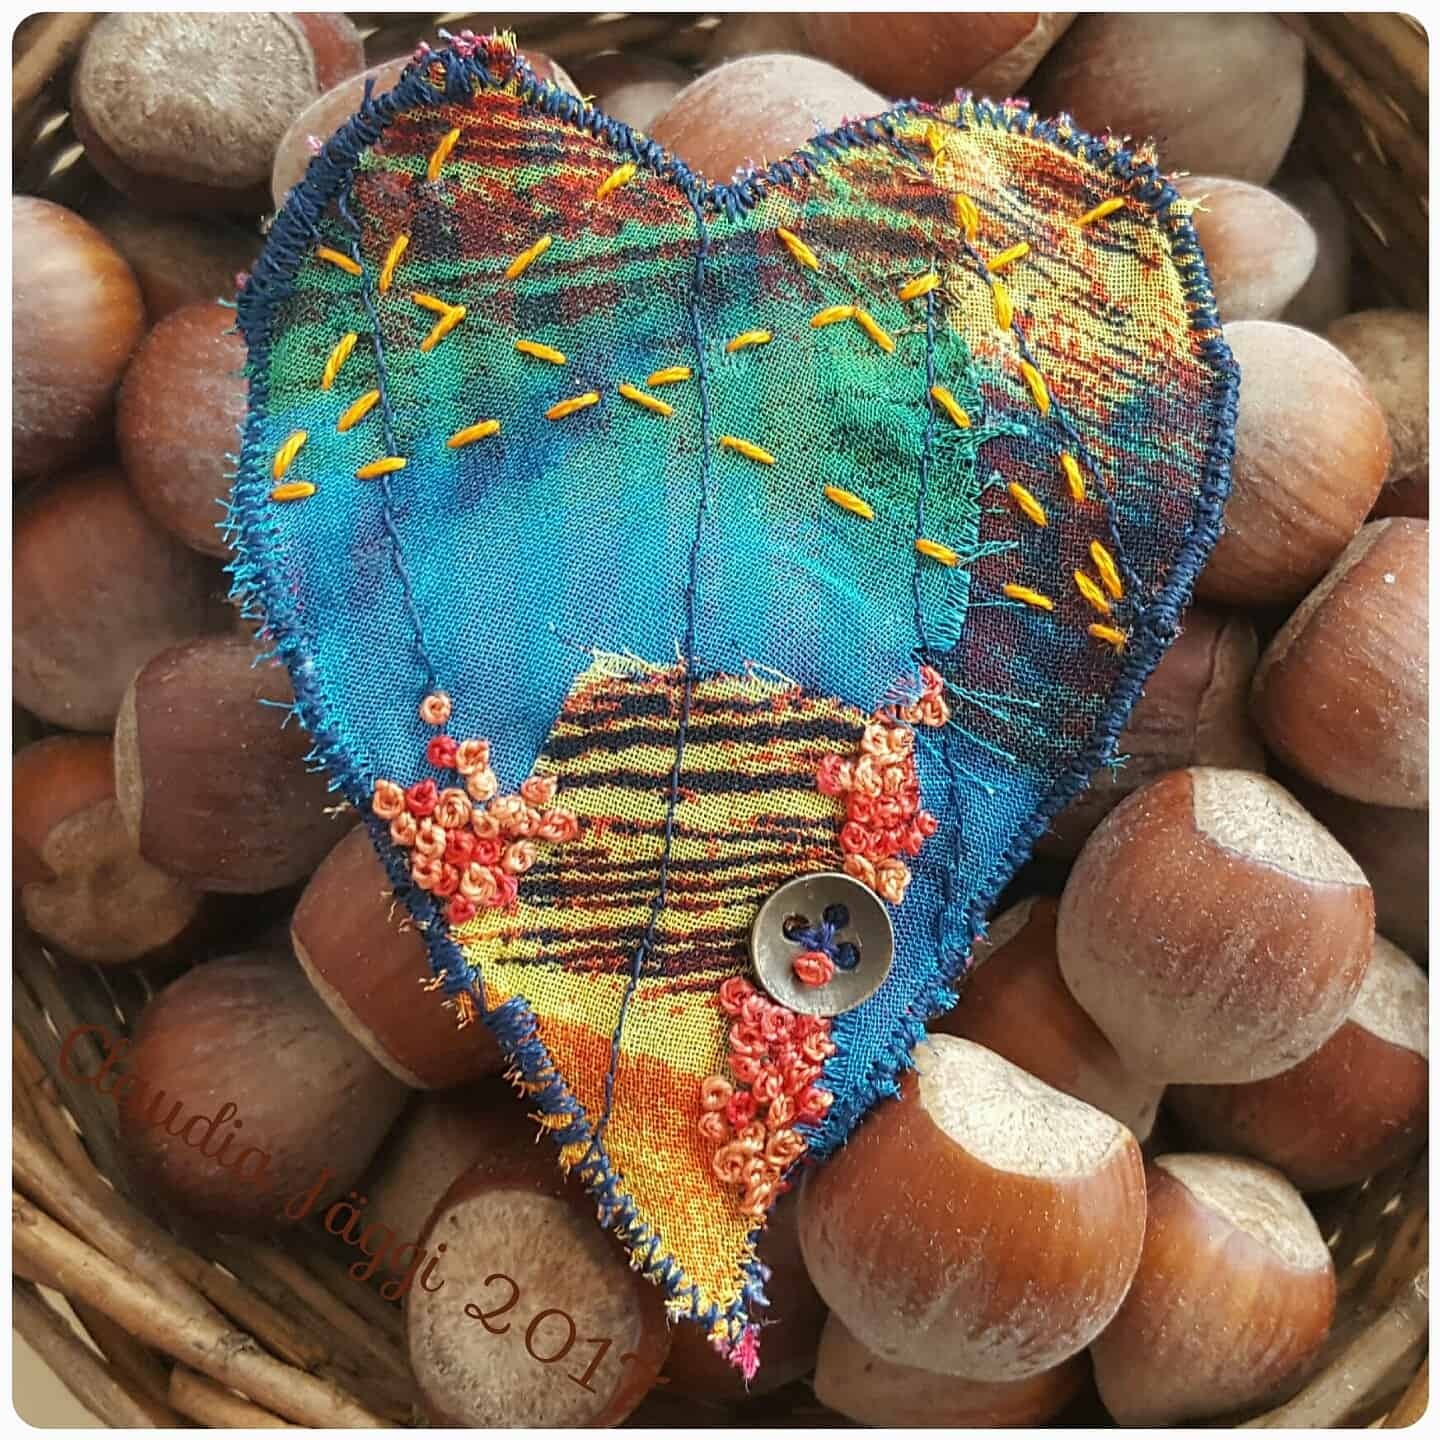
Step 5:
Embellish the patches with embroidery, vintage lace, buttons and other paraphernalia.
If you liked this tutorial, please let me know. I would love to see your patches! <3